Gyoza

Posted on

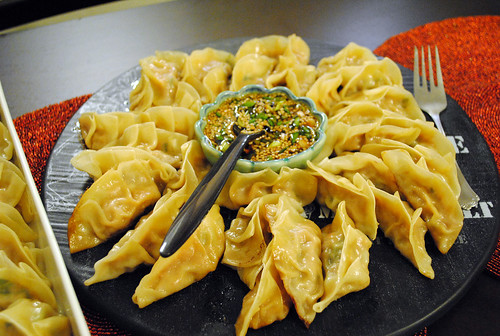
Gyoza, or Japanese potstickers, differ from their Chinese counterparts in that they have a thinner wrapper. They have a richer garlic flavor too, and are usually served with a soy-based rice vinegar and chili sauce. Sometimes I make a double batch as I’m wrapping the gyoza and stick the extras in the freezer – they make for a quick, delicious meal later on, and they’re much healthier than the store-bought frozen version.

Gyoza

Ingredients:

2 cups finely chopped cabbage
1/2 teaspoon salt
1 pound ground chicken or turkey
1/2 cup chopped water chestnuts
4 green onions, minced
3 tablespoons sake
1 tablespoon oyster-flavored sauce
1 1/2 tablespoons minced ginger
1 teaspoon cornstarch
1/4 cup rice vinegar
1/4 cup soy sauce
1 teaspoon chili garlic sauce
1 teaspoon sesame oil
1 package potsticker wrappers
2 tablespoons vegetable oil
1 cup chicken broth

1. In a bowl, toss cabbage with salt; let stand for 10 minutes. Drain and press cabbage to extract excess moisture. Add ground chicken, water chestnuts, 3 minced green onions, sake, oyster-flavored sauce, 1 tablespoon ginger, garlic, and cornstarch; mix well.

2. In another bowl, combine rice vinegar, soy sauce, chili garlic sauce, sesame oil, remaining minced green onion, and remaining 1/2 tablespoon of minced ginger to create dipping sauce. Set aside.

3. To shape each potsticker, place a teaspoon of filling in center of one wrapper. Brush edges with water; fold wrapper over filling to form a half-moon. Press and pleat edges to seal. Set filled potsticker down firmly, seam side up, so that it will sit flat.

4. Place a large nonstick frying pan over medium-high heat until hot. Add 1 tablespoon oil, swirling to coat sides. Add half of potstickers, seam side up, and cook until bottoms are golden brown, about 4 minutes. Add 1/2 cup broth, reduce heat to low, cover, and cook until dumplings are tender and liquid has evaporated, about 10 minutes.

5. With a spatula, remove potstickers from pan and place them on a serving platter. Repeat to cook remaining potstickers. Serve warm with dipping sauce.

Baked Pasta and Cheese with Radicchio, Pancetta and Porcini Mushrooms

Posted on

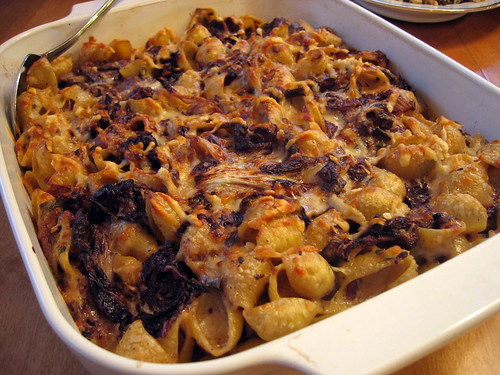
I have four macaroni and cheese recipes that I keep in regular rotation, and this is the most frequently requested of the bunch. It’s also the most labor intensive, so I tend to make it one or twice a year, usually during the holidays. Radicchio is not the most traditional ingredient in baked pasta dishes, but it lends a beautiful light purple hue to the dish and despite all the cheese and other not-so-good-for-you ingredients, you’re getting your vegetables too.

I adapted this dish from a Food and Wine magazine recipe. I use less than half the butter and cream than the original, making it not too unhealthy for a special occasion dish.

Baked Pasta and Cheese with Radicchio, Pancetta and Porcini Mushrooms

Ingredients:

1/2 ounce dried porcini mushrooms
Boiling water
2 tablespoons unsalted butter
1 tablespoon extra-virgin olive oil
2 ounces sliced pancetta, cut into 1/2-inch pieces
3 large garlic cloves, minced
2 heads of radicchio, each cut into 8 wedges through the core
Salt and ground pepper
2 teaspoons chopped fresh sage
1 pound medium shell pasta
1/4 cup all-purpose flour
2 cups low-fat milk
1 1/4 cup heavy cream
Pinch of freshly grated nutmeg
1/4 pound Asiago cheese, grated
5 ounces Fontina cheese, grated
1/4 cup freshly grated Parmesan cheese

1. Preheat the oven to 350°. Butter a 3-quart baking dish. In a heatproof bowl, soak the porcini in boiling water until softened, about 15 minutes. Rinse the porcini to dislodge any grit, then drain and chop them. Discard the soaking liquid.

2. In a large skillet, melt 1 tablespoon of the butter in the olive oil. Add the porcini, pancetta and one-third of the garlic and cook over medium-high heat, stirring occasionally, until the garlic is fragrant, about 3 minutes. Using a slotted spoon, transfer to a plate.

3. Add the radicchio wedges to the skillet and cook over high heat until wilted and beginning to brown, about 4 minutes. Add the remaining garlic, season with salt and pepper and cook, stirring, until the radicchio is slightly caramelized, about 5 minutes longer. Stir in the porcini mixture and the sage. Transfer the mixture to a large bowl.

4. Cook the pasta in a large pot of boiling salted water until al dente. Drain. Meanwhile, in a medium saucepan, melt the remaining butter. Add the flour and cook over moderately high heat, stirring, until foamy, about 2 minutes. Gradually whisk in the milk and bring to a boil; cook, whisking until thickened, about 3 minutes. Add the cream and nutmeg and season with salt and pepper. Transfer the sauce to the bowl with the radicchio.

5. Add the pasta to the bowl along with the Asiago and Fontina; toss to combine. Transfer the pasta to the prepared baking dish. Sprinkle with the Parmesan cheese. Bake for 20 minutes, or until heated through.

6. Preheat the broiler. Broil the pasta for 2 minutes, until the top is golden and bubbling. Let stand for 10 minutes; serve.

Hearts of Palm Salad with Shrimp and Avocado

Posted on

I first encountered hearts of palm at Pampas Grill, a Brazilian churrascaria in the Farmers Market in Los Angeles a couple of years ago. I have no idea how I’d gone so long without coming across the vegetable, but it’s been a favorite ever since then. I used them in making what is now one of my favorite salads:

Hearts of palm salad with shrimp and avocado

Ingredients:

2 tablespoons extra-virgin olive oil
2 tablespoons white wine vinegar
2 tablespoons drained capers
2 tablespoons lemon juice
1 tablespoon minced shallots
1 teaspoon Dijon mustard
2 cans hearts of palm, drained and rinsed
1 hard-boiled egg, shelled and chopped
1/2 pound cooked tiny shrimp
1 avocado, peeled and sliced
salt and pepper

1. In a bowl, whisk olive oil, vinegar, capers, lemon juice, shallots, mustard, and salt to taste. Cut hearts of palm in half lengthwise. Lay hearts of palm in dressing, turn over, and let stand for 5 minutes.

2.Lift hearts of palm from dressing and arrange on a large salad plate. Add shrimp to dressing in bowl and mix. Arrange avocado on salad. Spoon shrimp and all the dressing over the hearts of palm and avocado. Top with egg, and sprinkle with pepper to taste.

Crispy Chicken and Kimchi Potstickers

Posted on

anyone who knows me knows of my affinity for korean cuisine. and of my affinity for kimchi. and more specifically, my affinity for all things banchan. i can think of nothing better than an array of small plates to complement a plate of bulgogi or japchae. naturally, i relish the taste of kimchi in my dumplings.

Kimchi and chicken potstickers

recipe:

1 t toasted sesame seeds
1/3 c + 1 T soy sauce
1/4 rice vinegar
1 garlic clove, minced
4 green onions, thinly sliced
1/2 lb ground chicken or turkey
1/2 lb kimchi, drained and finely chopped
1 egg, beaten
2 t cornstarch
1/2 T sugar
1/2 t salt
1/4 pepper
gyoza wrappers
2 T vegetable oil
1 c water

1. in a small bowl, stir 1/3 cup of the soy sauce with the vinegar, water, garlic, 1 green onion, and sesame seeds.
2. in a large bowl. combine and mix the ground turkey with the kimchi, remaining green onions, egg, cornstarch, sugar, remaining soy sauce, salt and pepper.
3. place gyoza wrappers on a work surface and lightly moisten the edges of the wrappers with water. place a spoon of the filling on one side of each wrapper and fold in half to form half moons. press the edges of the wrapper firmly to seal. repeat with the remaining wrappers and filling.
4. in a large, nonstick skillet, heat 1 tablespoon of the oil. add half of the potstickers to the skillet. pour in 1/2 cup of the water, cover and cook over moderately high heat until the water has evaporated, the filling is cooked through and the bottoms are browned, about 10 minutes. transfer to a serving platter and repeat with the remaining oil, potstickers, and water. serve with the dipping sauce on the side.

Spring Pea Falafel

Posted on

khodahafez, taabestaan

a couple of weeks ago i scrambled to make the best of the end of summer produce. although i’ll have loads of mushrooms and squash and beets to look forward to, i’ll miss being able to easily make fresh renditions of these:

this was deeelicious!
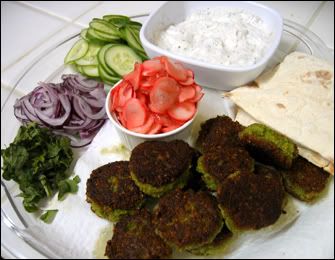
spring pea falafel with marinated radishes and minted yogurt

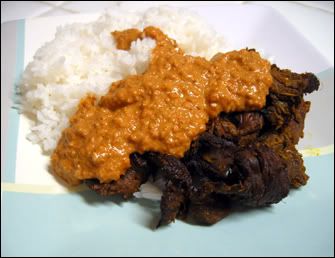
the peanut sauce was too thick
grilled beef sates with peanut sauce and jasmine rice

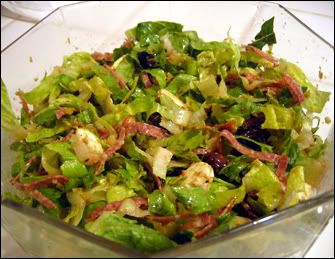
fresh mozzarella and salami! oh joy!
antipasti salad

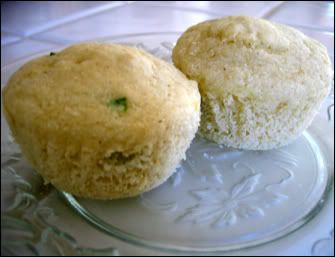
too flavorless
corn and jalapeno muffins

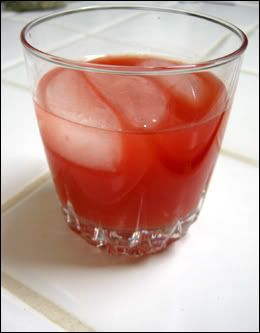
not too sweet
watermelon-ginger lemonade

here’s the recipe for the falafel:

1/2 cup dried yellow split peas
1 1/2 cups frozen peas, thawed
1/2 cup chopped onion
1 T flour
2 T chopped parsley
2 garlic cloves, chopped
1 t ground coriander
1 t ground cumin
1/2 t baking powder
1/4 t cayenne pepper
1 T fresh lemon juice
1 t salt
3 T olive oil

1. working in two batches, grind the split peas to a powder in a spice grinder. in a food processor, pulse the thawed peas a few times. add the ground split peas, onion, flour, parsley, garlic, coriander, cumin, baking powder, cayenne, lemon juice and salt and process until thoroughly combined. form the mixture into 12 falafel patties. refrigerate until firm.

2. in a large nonstick skillet, heat the olive oil. add the falafel patties in two batches and cook over moderately high heat until browned, crisp and heated through, about 3 minutes per side.

3. serve the falafel with flatbreads, yogurt, sliced red onions, fresh herbs, and marinated radishes.