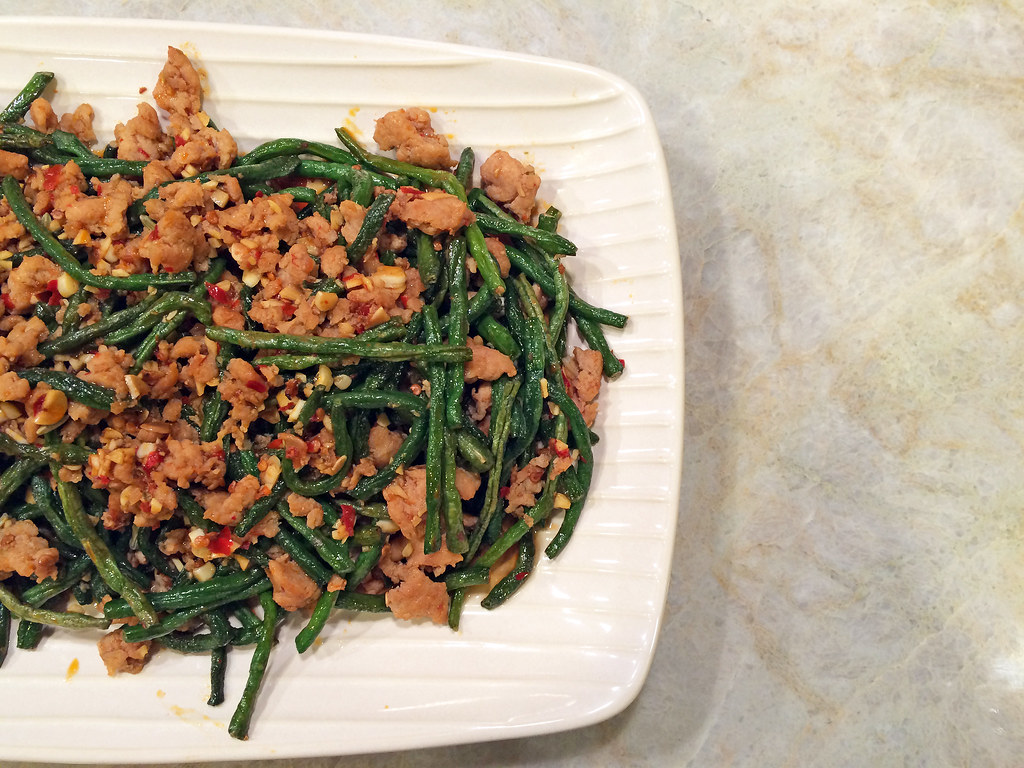
Okonomiyaki

Posted on

The first time I tried okonomiyaki, I had just moved in with my new roommates for college, two of whom were from Japan: Sanae from Tokyo and Sanae from Osaka. Throughout the year, I was fortunate to learn to cook all kinds of regional dishes with them, many of which can be hard to find in restaurants.

Okonomiyaki was the first homestyle Japanese dish that they taught me, and to this day, it remains one of my favorites. Loosely translated as “as you like it,” okonomiyaki is a savory pancake consisting of varying filling ingredients but the flour, egg, cabbage, and dashi base remain consistent.

Okonomiyaki, part one

My version of okonomiyaki is pretty standard, albeit without the mountain yam that can be so hard to track down. When I was in Japan two years ago, I tried a delicious rendition in Kyoto that had a fried noodle base, as well as another version with melted cheese and dried anchovies, so the possibilities are endless. The ingredient list might be daunting, but it’s worth the search – and oh, don’t forget the giant octopus tentacle.

Okonomiyaki, part two

Ingredients:

1/2 cup all-purpose flour
2/3 cup dashi stock
1 egg
1 cup cabbage, shredded
2 green onions, thinly sliced
benishoga red pickled ginger, chopped (not to be confused with gari pickled ginger, which is commonly served alongside sushi)
3 inches cooked octopus, finely chopped
1 handful dried bonito flakes
1/2 teaspoon dried nori flakes
okonomi sauce (available in Japanese and well-stocked Asian grocers)
Japanese-style mayonnaise (I recommend Kewpie brand)
vegetable oil

1. Place the flour and dashi stock in a bowl, and mix well. Add the cabbage, onion, benishoga ginger, octopus, and egg to the bowl, and mix well.

2. Heat a nonstick frying pan over medium-high heat and add one tablespoon vegetable oil. Pour 1/3 cup of the batter mixture into the pan, and sprinkle a few dried bonito flakes on top. Cook for about 3 minutes.

3. Carefully flip the pancake over, and cook for about 4 minutes. Reverse again, and cook for another 4 minutes. Transfer the pancake to a serving plate.

4. Spread okonomi sauce and mayonnaise on top of the pancake, and sprinkle with dried nori and bonito flakes.

5. Repeat steps 2 to 4 until batter is finished.

Crab and Tobiko Summer Rolls

Posted on

It’s only February, but I’ve had summer on my mind, and all the fresh dishes that go with it. The aptly-named summer rolls are one of my favorite things to eat in the warmer weather and with spring only a few weeks away, I’m making these early this year.

These seafood summer rolls pack a bunch with a chili-garlic spiked aioli and the crunchy, vinagared vegetables balance out the mayonnaise perfectly. If you take the time to prep your mise en place ahead of time here, putting these rolls together is a snap.

Crab and tobiko spring rolls

Ingredients:
1 (3-inch-long) piece daikon radish, peeled and julienned
1 carrot, peeled and julienned
3 tablespoons lime juice
1/4 teaspoon sesame oil
1 Persian cucumber, halved and julienned
1 1/2 tablespoons rice vinegar
1/4 cup mayonnaise
1 teaspoon chili-garlic sauce
1 ounce tobiko roe
3 teaspoons soy sauce
10 round rice-paper wrappers
1 pound crabmeat, picked over and coarsely flaked
1 green onion, thinly sliced diagonally

1. Combine one tablespoon of lime juice and soy sauce in a small bowl and set aside. In a separate bowl, toss carrot, daikon, and cucumber with vinegar, sesame oil, 2 tablespoons of the lime juice, and salt to taste.

2. In another bowl, mix chili-garlic sauce with mayonnaise and half of the tobiko and set aside.

3. Stir together the remaining lime juice and soy sauce in a small bowl.

4. Soak 1 rice paper wrappers in a baking dish of warm water until pliable, about 5 seconds. Put 1 soaked wrapper on a dry cutting board. Put one tablespoon of crabmeat across lower third of wrapper (nearest you), leaving a 2-inch border at bottom. Spread with 1/2 tablespoon mayonnaise-tobiko mixture and top with a few pieces of the carrot mixture and sliced scallion. Fold bottom of wrapper over filling and roll up tightly. Repeat with remaining filling ingredients and rice paper wrappers.

5. Cut each roll into 2 pieces. Arrange on a platter, standing them up, and top each with a dollop of tobiko. Drizzle lime-soy sauce around rolls.

Tofu Pad Thai

Posted on

I’ve struggled with homemade pad Thai. After trying to recreate it at home several times over the years, I sort of gave up and assumed I’d never be able to cook restaurant-style pad Thai at home.

That is, until I tried this recipe, adapted from the now-defunct Gourmet magazine. I didn’t have high hopes – after all, where was the shrimp? But despite the lack of meat, this rendition is full of flavor, texture, and best of all, it actually tastes like classic pad Thai.

Tamarind is essential to this dish so I don’t recommend substituting with similar flavors. And don’t be put off by the large volume of shallots – the first time I made this dish I only wished I’d fried up more crispy slices.

Tofu Pad Thai

Ingredients:

12 ounces dried flat rice noodles (1/4 inch wide)
3 tablespoons tamarind (from a pliable block)
1 cup boiling-hot water
1/2 cup soy sauce
1/4 cup packed light brown sugar
1 1/2 tablespoons chili garlic sauce
1 bunch green onions
4 shallots
1 16-ounce package firm tofu
1 cup vegetable oil
6 eggs
4 garlic cloves, finely chopped
2 cups bean sprouts
1/2 cup roasted peanuts, coarsely chopped

1. Soak noodles in a large bowl of warm water until softened, 20 minutes. Drain in a colander and set aside.

2. Meanwhile, make sauce by soaking tamarind pulp in boiling-hot water in a small bowl, stirring occasionally, until softened, about 5 minutes. Force mixture through a sieve into a bowl, discarding seeds and fibers. Add soy sauce, brown sugar, and chili garlic sauce, stirring until sugar has dissolved.

3. Cut green onions into 2-inch pieces. Cut shallots crosswise into very thin slices. Rinse tofu, then cut into 1-inch cubes and pat dry.

4. Heat oil in wok over medium heat until hot, then fry half of shallots over medium-low heat, stirring frequently, until golden-brown, 8 to 12 minutes. Strain mixture through a fine-mesh sieve into a bowl. Reserve shallot oil and spread fried shallots on paper towels. (Shallots will crisp as they cool.) Wipe wok clean.

5. Reheat shallot oil in wok over high heat until hot. Fry tofu in 1 layer, gently turning occasionally, until golden, 5 to 8 minutes. Transfer tofu to paper towels using a slotted spoon. Pour off frying oil and reserve.

6. Lightly beat eggs with 1/4 teaspoon salt. Heat 2 tablespoons shallot oil in wok over high heat until it shimmers. Add eggs and swirl to coat side of wok, then cook, stirring gently with a spatula, until cooked through. Break into chunks with spatula and transfer to a plate.

7. Heat wok over high heat, pour in 4 tablespoons shallot oil, then swirl to coat side of wok. Stir-fry scallions, garlic, and remaining uncooked shallots until softened, about 1 minute.

8. Add noodles and stir-fry over medium heat for 3 minutes. Add tofu, bean sprouts, and 1 1/2 cups sauce and simmer, turning noodles over to absorb sauce evenly, until noodles are tender, about 3 minutes.

9. Stir in additional sauce if desired, then stir in eggs and transfer to a large shallow serving dish. Sprinkle pad Thai with peanuts and fried shallots and serve.

Classic Hot Wings

Posted on

I know, I know. Hot wings are overdone. They’re on every party menu and come in a million variations. But these are baked! And taste like they’re fried! I guess you could call these healthy hot wings, except that they’re doused in their fair share of butter. Still, they’re tried and true, and I’ve been getting requests to make them for nearly every casual gathering lately.

Hot Wings

Ingredients:

2 tablespoons all-purpose flour
1 teaspoon salt
2 pounds chicken wings
3 tablespoons red hot sauce, preferably Frank’s Red Hot
2 tablespoons unsalted butter, melted

1. Preheat the oven to 500°. Line a large baking sheet with foil and spray with vegetable oil. In a bowl, mix the flour with the salt. Add the chicken and toss to coat. Spread the chicken on the baking sheet in a single layer.

2. Roast the chicken for 45 minutes, turning once at the halfway point, until browned and crispy. In a bowl, whisk the hot sauce with the butter. Add the chicken wings and toss. Serve warm.

Sesame Chicken

Posted on

Karaage is a Japanese-style of frying where meats are lightly dusted with starch before deep-frying. The result is a wonderfully crispy coating that also works to seal in moisture. It also absorbs very little oil so this isn’t nearly as greasy as most deep-fried foods.

This sesame chicken dish, adapted from a Martin Yan recipe, employs karaage-style frying and amazingly, when I reheated leftovers of this dish the next day, the chicken was still crispy. Served atop a bed of steamed spinach and alongside rice, it’s a complete and easy to make meal.

Sesame chicken

Ingredients:

1/2 cup soy sauce
1/2 cup sake
1/2 cup dashi stock
1/4 cup sugar
2 teaspoons minced garlic
1/2 teaspoon minced ginger
2 teaspoons cornstarch dissolved in 2 tablespoons water
1 teaspoon sesame seeds
1 bunch spinach, stems removed, rinsed and coarsely chopped
1 pound boneless chicken thighs, cut into 2-by-2-inch pieces
cornstarch
vegetable oil
steamed rice

1. Combine soy sauce, sake, dashi, sugar, garlic, and ginger in a medium saucepan. Cook over medium heat, stirring once or twice, until sugar is dissolved. Reduce heat and simmer, uncovered, for 10 minutes. Add cornstarch solution and cook, stirring, until sauce boils and thickens. Keep sauce warm.

2. Cook spinach in boiling water for 1 minute; drain well and set aside.

3. Dredge chicken in cornstarch; shake off excess. Place a wide frying pan over medium heat. Add oil to a depth of 1/4 inch. When oil is hot, add chicken and pan-fry, uncovered, until no longer pink in center, about 4 minutes on each side. Lift out and drain on paper towels.

4. Place rice in 4 individual bowls; top each serving with 1/4 of the spinach. Cut chicken into 1/2-inch-wide strips, dip in sauce, then arrange over spinach. Sprinkle with sesame seeds and serve with rice.