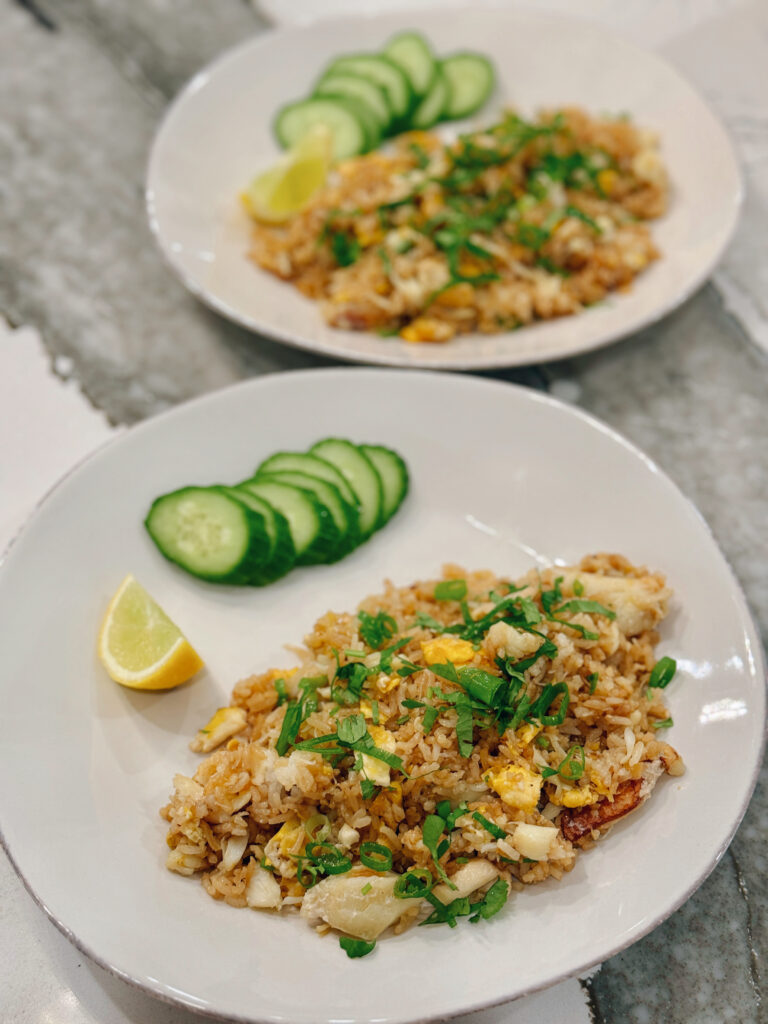
Classic Fried Rice

Posted on

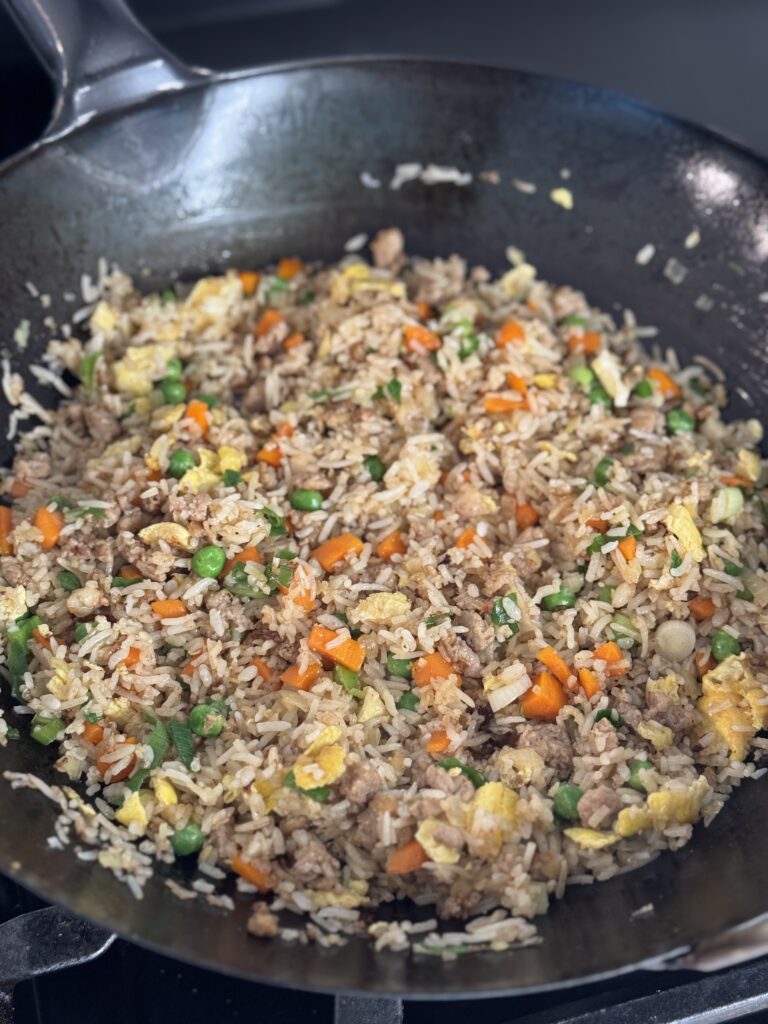
I love fried rice in almost all its permutations: crab fried rice, kimchi fried rice, Thai fried rice, you get the pictures. Cold rice, hot pan, a handful of basics from the fridge somehow turning into something better than the sum of its parts. This classic version is fast, comforting, a little smoky around the edges, and exactly the kind of dinner that saves a weeknight without feeling like a compromise.

Ingredients:
  • 2 to 3 cups cooked white rice
  • 1/4 cup avocado oil
  • 2 eggs, lightly beaten
  • 4 ounces ground chicken
  • 2 ounces shrimp, chopped into 1/4-inch pieces
  • 1/4 teaspoon white pepper, plus more for serving
  • 1 tablespoon plus 1 teaspoon soy sauce
  • 1 teaspoon sugar
  • 2 teaspoons minced garlic
  • 2 teaspoons minced ginger
  • 1/2 teaspoon sugar
  • 1 teaspoon cornstarch
  • 1/4 teaspoon baking soda
  • 1/2 small onion, chopped
  • 1 small carrot, peeled and diced
  • 2 green onions, chopped
  • 1 teaspoon oyster sauce
  • 1 teaspoon sesame oil
  • 3/4 cup frozen peas
  • Salt, to taste
  1. Combine the chicken, shrimp, white pepper, 1 tablespoon soy sauce, garlic, ginger, sugar, cornstarch, and baking soda in a bowl and mix vigorously with your fingers until the mixture feels slightly tacky, about 1 minute. Set aside. (Mixture can be made up to two days ahead and stored in the refrigerator until ready to use.)
  2. Heat a wok over high heat and add 2 tablespoons avocado oil and swirl to coat. Reduce the heat to medium and add eggs into the center of the wok and cook, lightly swirling the work, until the eggs are puffy, about 30 seconds. Using a spatula, carefully flip the eggs and cook for another 20 seconds, then transfer the eggs to a bowl and set aside.
  3. Return the empty wok to high heat and add one tablespoon oil, then add the chicken mixture and cook, stirring, until the meat is starting to cook through, about 2 minutes. Add the onion and carrot and cook, stirring, until lightly softened and fragrant, about 1 minute. Transfer to the bowl with the eggs.
  4. Return the wok to high heat and add the rice and cook, stirring and tossing, until the rice is starting to turn pale brown and toasted, about 3 minutes. Add the green onions and stir-fry until fragrant, about 30 seconds.
  5. Return the chicken mixture, vegetables, and egg to the wok, using the spatula to break up the egg into small pieces as you mix everything together. Add the oyster sauce, soy sauce, sesame oil, and peas, and toss until well combined. Season with salt and pepper to taste, and serve.

Kale Ohitashi

Posted on

Ohitashi is a Japanese side dish made by blanching vegetables and soaking them in a light dashi and soy-based broth. This simple version features kale and it’s perfect because it’s easy, you can make it ahead of time, it’s super healthy, and it tastes great. Serve it room temperature alongside a Japanese meal and feel free to replace the kale with Swiss chard or any other hearty, leafy greens.

Ingredients:
  • Salt
  • 1/2 pound bunch curly kale (about 1 punch), bottom stems trimmed and discarded
  • 1 1/2 cups dashi
  • 1 teaspoon soy sauce
  • 1 teaspoon mirin
  • 1 tablespoon bonito flakes
  1. Bring a medium pot of salted water to a boil. Prepare a medium mixing bowl full of ice water in the meantime.
  2. Blanch the kale in the boiling water until it is tender but still retains its texture, about 2 to 3 minutes. Transfer the kale to the icy water and let it cool. Drain the kale in a colander and squeeze to remove excess water.
  3. Combine the dashi, soy sauce, mirin, and 1/2 teaspoon salt in a small saucepan over medium heat and cook, stirring, until the salt dissolves. Let the dashi mixture cool and pour it into a medium bowl. Add the kale, stir, and cover the bowl. Refrigerate for at least 2 hours or up to 24 hours.
  4. When ready to eat, gently take the kale out of the bowl, leaving the liquid behind. Line up the kale leaves on a cutting board and gather them into a long bundle and cut crosswise into 2-inch pieces and arrange them on a serving plate. Spoon on about 3 tablespoons of the reserved liquid or more to taste. Sprinkle the bonito flakes on top and serve.

Cumin Lamb

Posted on

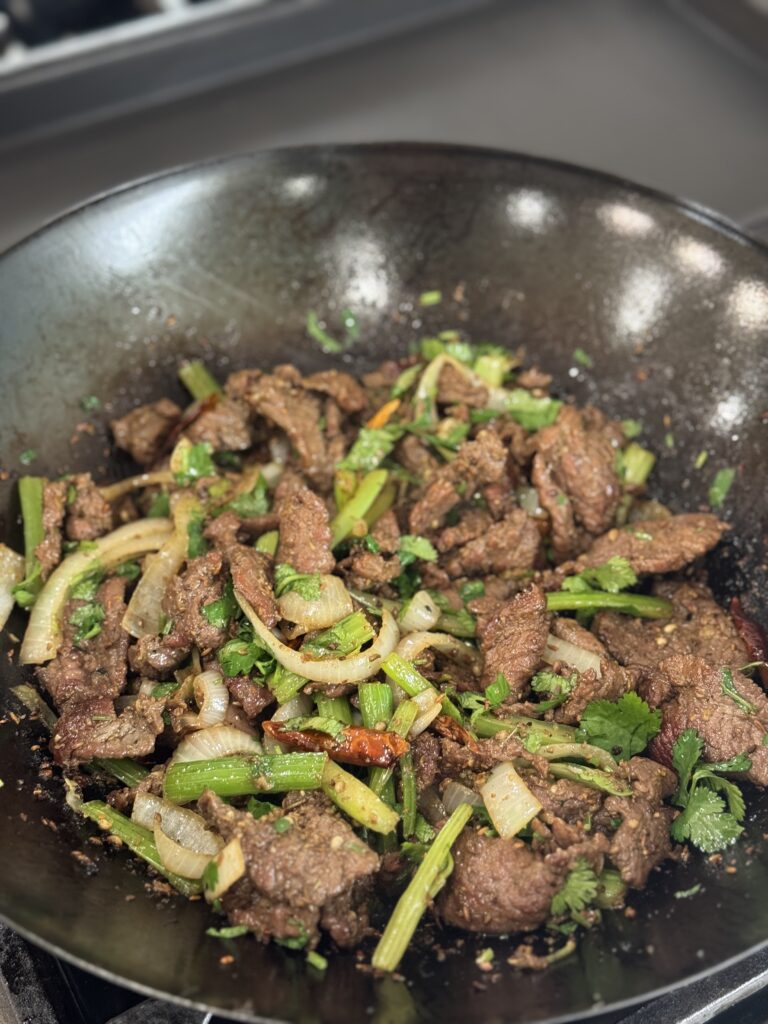
I already have a cumin beef recipe on my blog, and it’s delicious. The problem is I love all iterations of the famous Xinjiang speciality and I can’t say no to any version, ever since I first tried it at Old Mandarin Islamic Restaurant in San Francisco decades ago.

This version uses celery in place of bell peppers and lamb in place of the beef. Try both and see which version you prefer. (Spoiler alert: I can’t choose.)

Ingredients:

For the lamb:

  • 1 pound boneless lamb leg or shoulder, trimmed and sliced into 1/4-inch thick pieces
  • 1/2 teaspoon baking soda

For the marinade:

  • 3 tablespoons cumin seeds
  • 2 teaspoons Sichuan peppercorns
  • 12 small dried red Chinese chiles
  • 3 garlic cloves, minced (about 1 tablespoon)
  • 1 tablespoon soy sauce

For the stir-fry:

  • 4 tablespoons avocado oil
  • 1 onion, cut into 1/2-inch wedges or slices
  • 3 celery stalks, sliced lengthwise into thirds and crosswise into 2-inch pieces
  • salt
  • 1/4 bunch of cilantro, leaves and thin stems only
  1. Prepare the lamb: Place the lamb in a medium bowl, cover with cold water, and vigorously agitate it. Drain through a fine-mesh strainer set in the sink and press on the lamb with your hands to remove excess water. Return the lamb to the bowl, add the baking soda, and vigorously massage the baking soda into the meat, lifting the meat, throwing it down, and squeezing it for 30 seconds.
  2. Prepare the marinade: Heat the cumin seeds, peppercorns, and chiles in a skillet over medium-high heat, tossing until fragrant, about 2 minutes. Transfer to a mortar and pestle. Pick out the chiles and set them aside. Grind the cumin and peppercorns until roughly crushed but pieces still remain. Stir. in the soy sauce and scrape the mixture into the bowl with the lamb. Work the marinade into the meat for 30 seconds and set aside.
  3. Prepare the stir-fry: Heat a wok over high heat until lightly smoking. Add 1 tablespoon oil and swirl to coat. Add the onion and celery and cook, stirring and tossing occasionally until lightly charred and tender, about 2 minutes. Transfer to a bowl.
  4. Wipe out the wok and return it to high heat until lightly smoking. Add 2 more tablespoons of oil and swirl to coat. Add half the lamb and cook without moving for 1 minute. Continue cooking while stirring and tossing until lightly cooked but still pink in spots, about 1 minute. Transfer to the bowl with the onions and celery. Repeat with the remaining oil and lamb, adding the cooked lamb to the same bowl.
  5. Return the wok to high heat until lightly smoking. Add the chiles and immediately return the cooked lamb and vegetables. Cooking, stirring and tossing occasionally until the lamb develops a medium crust, about 2 minutes longer. Season to taste with salt, add the cilantro, and give it another toss to combine. Transfer to a platter and serve with rice.

Dashi Deviled Eggs

Posted on

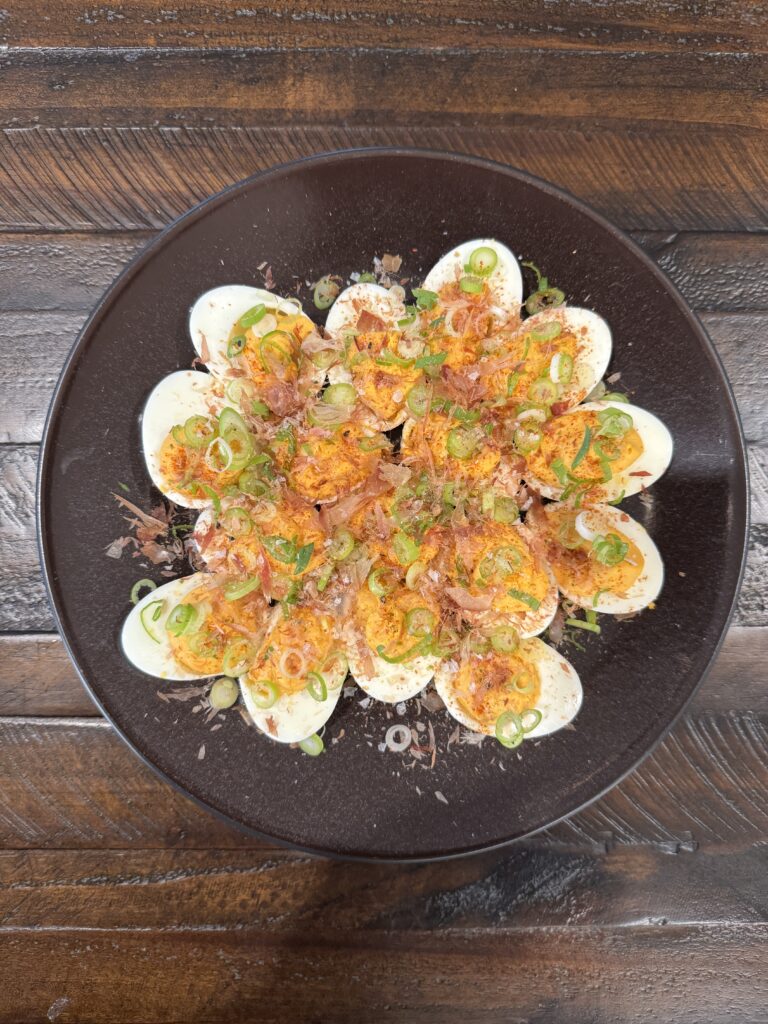
I didn’t realize I love deviled eggs until I was almost thirty but man, have I made up for lost time. Red pepper and gouda deviled eggs? Check. Spanish deviled eggs? Check. These deviled eggs, adapted from The Wok and made with Japanese instant dashi and topped with ethereal katsuobushi, are my new favorite. J. Kenji Lopez-Alt, you’ve done it again.

Ingredients:

  • 6 hard-boiled eggs, peeled
  • 2 teaspoons rice vinegar
  • 1/4 teaspoon Dijon mustard
  • 3 tablespoons mayonnaise
  • 1 teaspoon instant dashi granules
  • Salt
  • Thinly sliced green onions, to garnish
  • Shichimi togarashi, to garnish
  • Katsuobushi shavings, to garnish
  1. Cut the eggs in half lengthwise. Place the yolks in the bowl of a food processor and set the egg white halves aside on a serving platter. Add the vinegar, mustard, mayonnaise, and instant dashi to the food processor and process until smooth. Season with salt to taste.
  2. Transfer the yolk mixture to a piping bag fitted with a piping tip (or a ziplock bag).
  3. Pipe a small dollop of filling into each egg white, distributing evenly. Top with green onions, shichimi togarashi, katsuobushi, and serve.

Crab Fried Rice

Posted on

It’s Dungeness crab season! The best season! Crab curry! Pasta with crab! Crab fried rice! This Thai version of fried rice, fragrant and spicy with lemongrass and chiles and flecked with chunks of Dungeness crab, is one of my favorite renditions of the classic dish that seems to be ubiquitous throughout the Bay Area come every winter.

Ingredients:

For the prik nam pla:

  • 2 tablespoons fish sauce
  • 2 tablespoons lime juice 
  • 1/4 teaspoon sugar
  • 1 Thai chile, thinly sliced

For the fried rice:

  • 3 1/2 cups lump crab meat, preferably from Dungeness crab
  • 1 tablespoon minced lemongrass
  • 1/2 teaspoon minced makrut lime leaves
  • 1/4 cup plus 1 tablespoon canola oil
  • 2 tablespoons finely chopped garlic
  • 4 large eggs
  • 4 cups cold day-old cooked jasmine rice
  • 3 teaspoons granulated sugar 
  • 4 teaspoons soy sauce
  • 1/2 teaspoon fish sauce
  • 1/2 cup thinly sliced green onions, plus more for garnish
  • 1/2 teaspoon pepper
  • Cilantro leaves, for garnish
  • Lime wedges, sliced cucumber, for serving
  1. Make the prik nam pla: whisk together all prik nam pla ingredients in a small bowl until well combined. Set aside until ready to use.
  2. Make the fried rice: heat oil in a large wok or large skillet over medium until shimmering. Add garlic, lemongrass, and makrut lime, and cook, stirring constantly, until fragrant, 15 to 20 seconds. Crack eggs into wok; cook, undisturbed, just until edges of whites start to set, about 15 seconds. Stir eggs using a spatula until scrambled, about 30 seconds. Add rice and sugar; cook, stirring often, until rice is slightly caramelized, about 2 minutes. Continue to cook, stirring constantly, about 2 to 3 minutes. Stir in soy sauce, and fish sauce until incorporated, about 1 minute.
  3. Add reserved crabmeat to wok; cook, stirring constantly, until crab is heated through, 1 to 2 minutes. Add green onions and pepper; turn off heat, and stir until green onions soften, about 1 minute.
  4. Garnish with cilantro and extra green onions, and serve immediately with lime wedges, sliced cucumber, and prik nam pla.